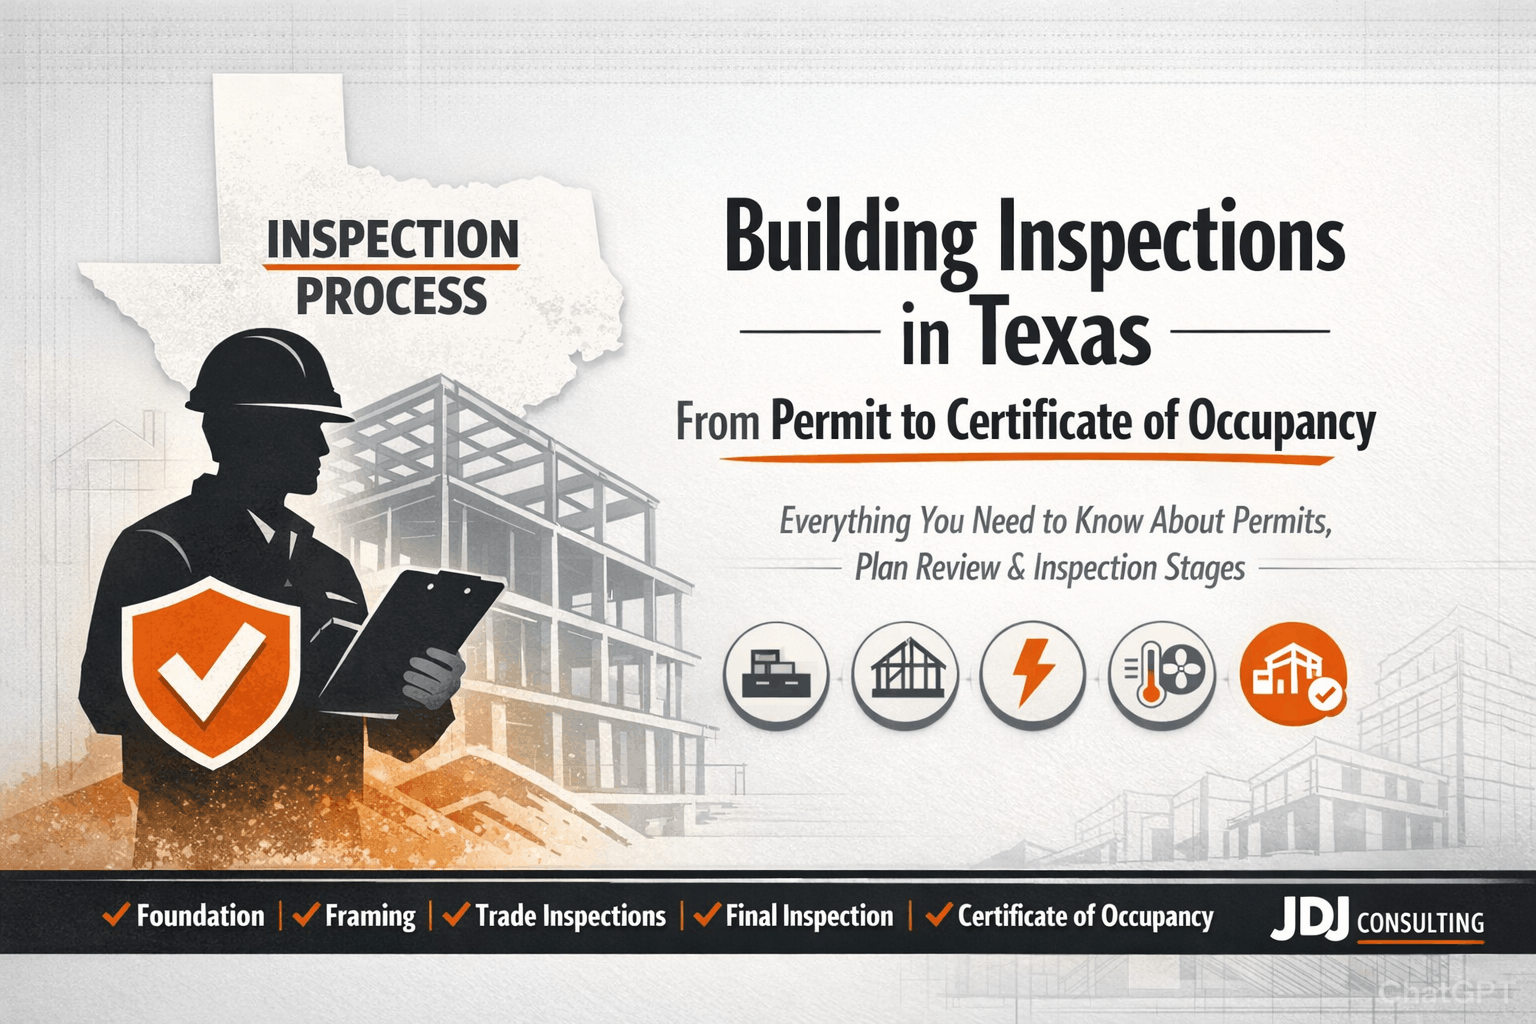
Building a home or commercial property in Texas can be exciting. But it also comes with responsibilities. One of the most important responsibilities is ensuring that your project meets safety and building codes. That’s where the building inspection process comes in.
Inspections ensure that construction work is safe, legal, and done according to approved plans. They protect your investment and help avoid costly mistakes later. In this guide, we’ll cover everything you need to know about inspections in Texas—from permits to the final Certificate of Occupancy.
What Is a Building Inspection and Why It Matters?
A building inspection is an official review of your construction project. Trained inspectors check that work is done correctly and safely. They compare your construction to approved plans and ensure it meets local codes.
Inspections happen at various stages of construction. Some happen before walls are closed, while others happen at the end of the project. These checks help protect property owners, future occupants, and the public.
Purpose of Building Inspections
The main goals of inspections are simple but important:
Ensure construction follows local and state codes.
Identify safety hazards early, before they become major problems.
Confirm that work matches approved plans.
Provide documentation for a Certificate of Occupancy (CO).
Passing inspections also protects you from fines or legal issues. In Texas, skipping inspections or failing to get permits can result in serious penalties.
Types of Building Inspections in Texas
Texas does not have a single statewide inspection process. Each city or county sets its own rules. But most inspections fall into these categories:
| Inspection Type | When It Happens | What Is Checked |
|---|---|---|
| Foundation | After excavation, before concrete is poured | Footings, reinforcement, and plan compliance |
| Framing | After structural frame is built | Wall bracing, beams, and alignment |
| Electrical/Plumbing | Before walls are closed | Rough-in wiring, pipes, and connections |
| Mechanical/HVAC | After ductwork and system installation | Safety, efficiency, and code compliance |
| Insulation | Before drywall | Energy compliance and proper installation |
| Final | After all work is complete | Overall safety, code compliance, and CO readiness |
This table provides a clear picture of the stages your project will go through. Scheduling inspections at the right time keeps your project on track.
Before Inspections — Permits and Plan Review
Before any inspection can happen, you need permits. Permits are legal approvals from your city or county. They confirm that your project meets local zoning and building codes.
Without a permit, inspectors cannot check your work. Starting construction without proper permits can lead to fines or stop-work orders.
How to Get a Building Permit
Getting a permit is usually straightforward, but it requires preparation:
Submit your plans: Include detailed drawings of your project.
Check local requirements: Cities may require energy compliance or flood-zone verification.
Pay permit fees: Fees vary by city and project size.
Wait for approval: Some cities approve permits within a few days, while others may take longer.
Once approved, your permit sets the schedule for inspections. It also tells inspectors exactly what they should check on site.
Plan Review
Before a permit is issued, most cities perform a plan review. This is a detailed check of your submitted plans. Inspectors and plan reviewers look for:
Correct site layout and setbacks
Structural details like beams and foundation depth
Electrical, plumbing, and mechanical specifications
Compliance with energy codes and local amendments
The plan review ensures that your project is ready for inspections and prevents delays. By catching issues before construction begins, you save time and money.
Why Plan Review Matters
Skipping or rushing plan review can cause problems later:
Inspectors may reject work that doesn’t match approved plans.
Changes after construction starts can be expensive.
Some cities require plan approval before scheduling any inspection.
In short, a careful plan review makes the rest of the building process smoother and reduces risks of failed inspections.
| Step | Purpose | Notes |
|---|---|---|
| Submit plans | Show the city what you will build | Include site plan, foundation, framing, and trades |
| Review by city | Ensure compliance with codes | City may request corrections before permit issuance |
| Permit approval | Authorize construction and inspections | Required for scheduling inspections |
| Post permit on site | Display for inspectors | Helps inspectors verify compliance |
This simple table shows the plan review steps clearly and can guide your project from start to inspection.
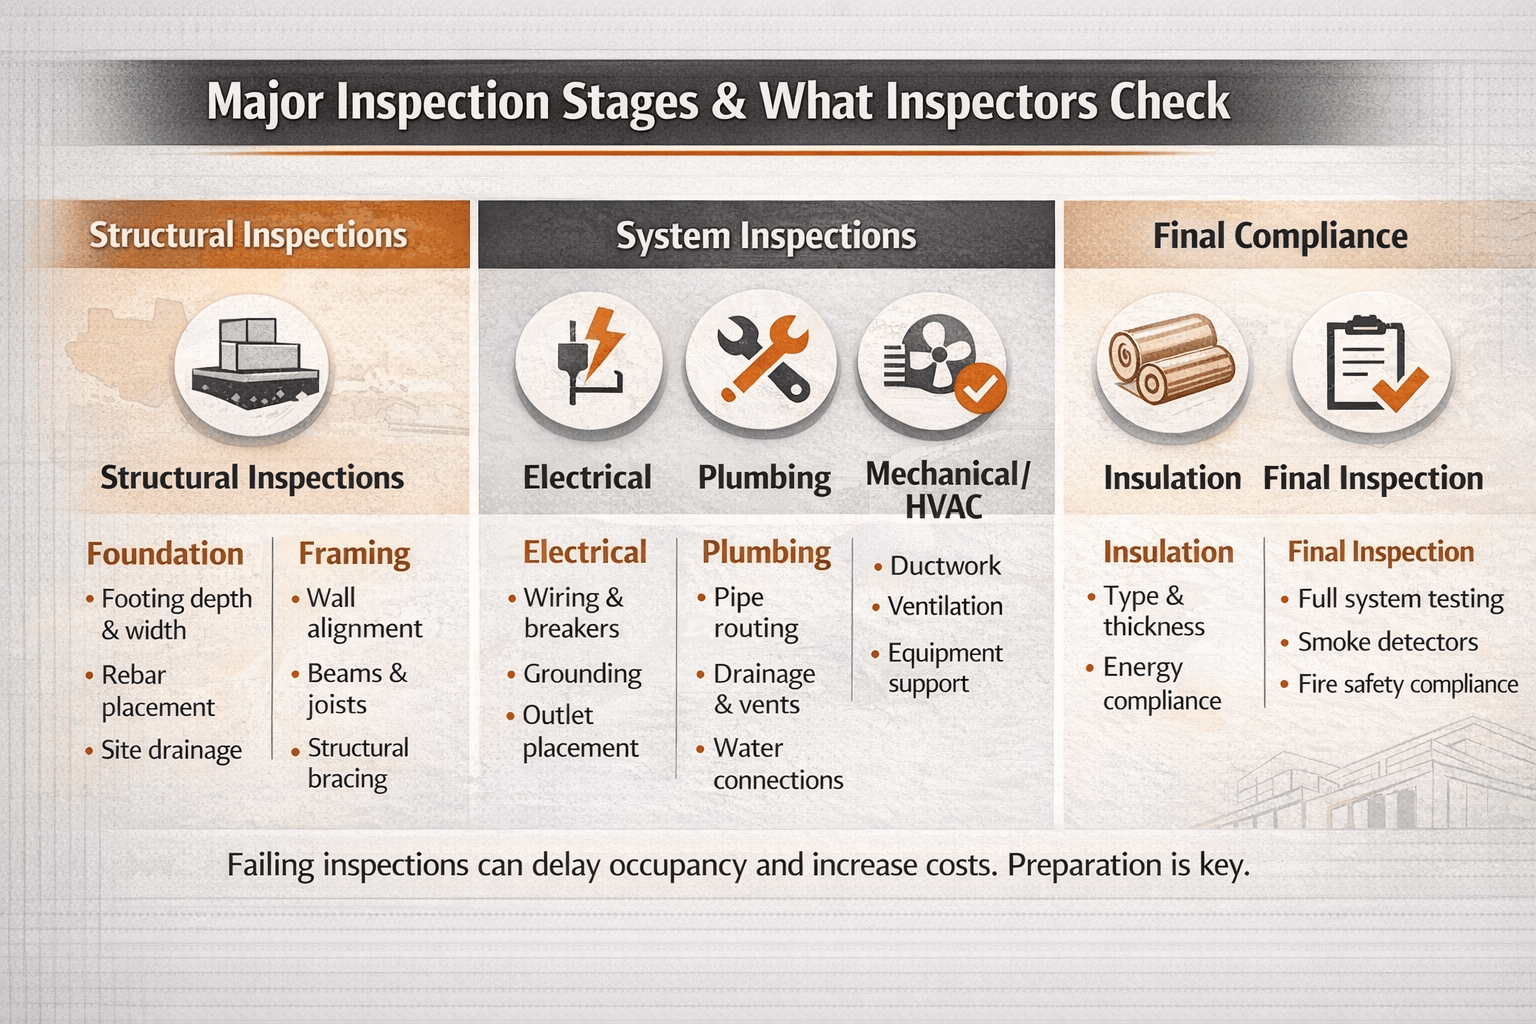
Major Inspection Stages in the Building Process
Once your permit is approved and plans are ready, the construction process begins. Inspections are scheduled at key points. Each stage ensures work meets building codes and follows approved plans. Skipping or rushing inspections can lead to costly delays or safety issues.

In Texas, inspections usually follow a standard sequence, though local requirements may vary by city or county. Here’s a breakdown of the main stages.
Foundation Inspection
The first critical inspection happens at the foundation. This occurs after excavation is complete but before concrete is poured.
Inspectors check:
Footings are the correct depth and width
Reinforcing steel (rebar) is properly placed
Formwork matches approved plans
Site drainage and soil conditions
Foundation inspection ensures that the base of your structure is strong and safe. A poor foundation can lead to structural issues later.
Tips for a smooth foundation inspection:
Have your site clean and accessible
Keep construction plans and permit card visible on-site
Mark all footing locations clearly
Framing Inspection
After the foundation is approved and the skeleton of the building is up, the framing inspection takes place. This inspection usually happens before walls, insulation, or drywall are installed.
Inspectors verify:
Correct placement of beams, joists, and walls
Adequate bracing and structural support
Openings for doors and windows are accurate
Alignment with approved plans
Framing is where many hidden problems occur. Inspectors catch errors early, saving money and time.
Trade Inspections (Electrical, Plumbing, Mechanical)
Once framing is approved, trade inspections take place. These include:
Electrical Rough-In
Check wiring, breakers, and connections
Ensure outlets and fixtures are properly installed
Verify grounding and bonding
Plumbing Rough-In
Inspect pipes for leaks and correct placement
Check vents and drainage systems
Confirm connection to water and sewer lines
Mechanical/HVAC
Verify ductwork and vent installation
Ensure equipment is properly supported
Test safety devices and airflow
Trade inspections ensure all internal systems are safe and compliant before walls are closed.
Insulation Inspection
After trade inspections, but before drywall installation, an insulation inspection is required.
Inspectors check:
Proper insulation type and thickness
Correct installation around pipes, ducts, and framing
Energy compliance according to Texas code
Proper insulation improves energy efficiency and ensures your building meets local energy standards.
Final Building Inspection
The final inspection occurs after all construction is complete. The inspector verifies:
All structural elements meet code
Electrical, plumbing, and mechanical systems function correctly
Safety features like exits, smoke detectors, and fire-rated doors are in place
Work matches approved plans
Passing this inspection is usually the last step before receiving your Certificate of Occupancy (CO).
Inspection Stage Summary Table
| Stage | When It Happens | What Inspectors Check |
|---|---|---|
| Foundation | After excavation, before pouring concrete | Footings, rebar, plan compliance |
| Framing | After structural frame is built | Walls, beams, bracing, openings |
| Electrical Rough-In | After framing, before drywall | Wiring, outlets, breakers, grounding |
| Plumbing Rough-In | After framing, before drywall | Pipes, drainage, vents, water connection |
| Mechanical/HVAC | After framing, before drywall | Ducts, vents, equipment, safety |
| Insulation | Before drywall | Type, thickness, proper installation |
| Final Building Inspection | After all work complete | Safety, code compliance, overall project readiness |
This table gives a clear overview of all stages and what to expect at each inspection.
Major Inspection Stages in the Building Process
Once your permit is approved and plans are ready, the construction process begins. Inspections are scheduled at key points. Each stage ensures work meets building codes and follows approved plans. Skipping or rushing inspections can lead to costly delays or safety issues.
In Texas, inspections usually follow a standard sequence, though local requirements may vary by city or county. Here’s a breakdown of the main stages.
Foundation Inspection
The first critical inspection happens at the foundation. This occurs after excavation is complete but before concrete is poured.
Inspectors check:
Footings are the correct depth and width
Reinforcing steel (rebar) is properly placed
Formwork matches approved plans
Site drainage and soil conditions
Foundation inspection ensures that the base of your structure is strong and safe. A poor foundation can lead to structural issues later.
Tips for a smooth foundation inspection:
Have your site clean and accessible
Keep construction plans and permit card visible on-site
Mark all footing locations clearly
Framing Inspection
After the foundation is approved and the skeleton of the building is up, the framing inspection takes place. This inspection usually happens before walls, insulation, or drywall are installed.
Inspectors verify:
Correct placement of beams, joists, and walls
Adequate bracing and structural support
Openings for doors and windows are accurate
Alignment with approved plans
Framing is where many hidden problems occur. Inspectors catch errors early, saving money and time.
Trade Inspections (Electrical, Plumbing, Mechanical)
Once framing is approved, trade inspections take place. These include:
Electrical Rough-In
Check wiring, breakers, and connections
Ensure outlets and fixtures are properly installed
Verify grounding and bonding
Plumbing Rough-In
Inspect pipes for leaks and correct placement
Check vents and drainage systems
Confirm connection to water and sewer lines
Mechanical/HVAC
Verify ductwork and vent installation
Ensure equipment is properly supported
Test safety devices and airflow
Trade inspections ensure all internal systems are safe and compliant before walls are closed.
Insulation Inspection
After trade inspections, but before drywall installation, an insulation inspection is required.
Inspectors check:
Proper insulation type and thickness
Correct installation around pipes, ducts, and framing
Energy compliance according to Texas code
Proper insulation improves energy efficiency and ensures your building meets local energy standards.
Final Building Inspection
The final inspection occurs after all construction is complete. The inspector verifies:
All structural elements meet code
Electrical, plumbing, and mechanical systems function correctly
Safety features like exits, smoke detectors, and fire-rated doors are in place
Work matches approved plans
Passing this inspection is usually the last step before receiving your Certificate of Occupancy (CO).
Inspection Stage Summary Table
| Stage | When It Happens | What Inspectors Check |
|---|---|---|
| Foundation | After excavation, before pouring concrete | Footings, rebar, plan compliance |
| Framing | After structural frame is built | Walls, beams, bracing, openings |
| Electrical Rough-In | After framing, before drywall | Wiring, outlets, breakers, grounding |
| Plumbing Rough-In | After framing, before drywall | Pipes, drainage, vents, water connection |
| Mechanical/HVAC | After framing, before drywall | Ducts, vents, equipment, safety |
| Insulation | Before drywall | Type, thickness, proper installation |
| Final Building Inspection | After all work complete | Safety, code compliance, overall project readiness |
This table gives a clear overview of all stages and what to expect at each inspection.
Tips for Successful Inspections
Schedule early: Don’t wait until the last minute. Give inspectors enough notice.
Keep the site clean and accessible: Inspectors need to see the work clearly.
Have all documents ready: Permit card, approved plans, and previous inspection reports.
Communicate with the inspector: Ask questions if something is unclear.
Correct issues promptly: Failing inspections can delay your project significantly.
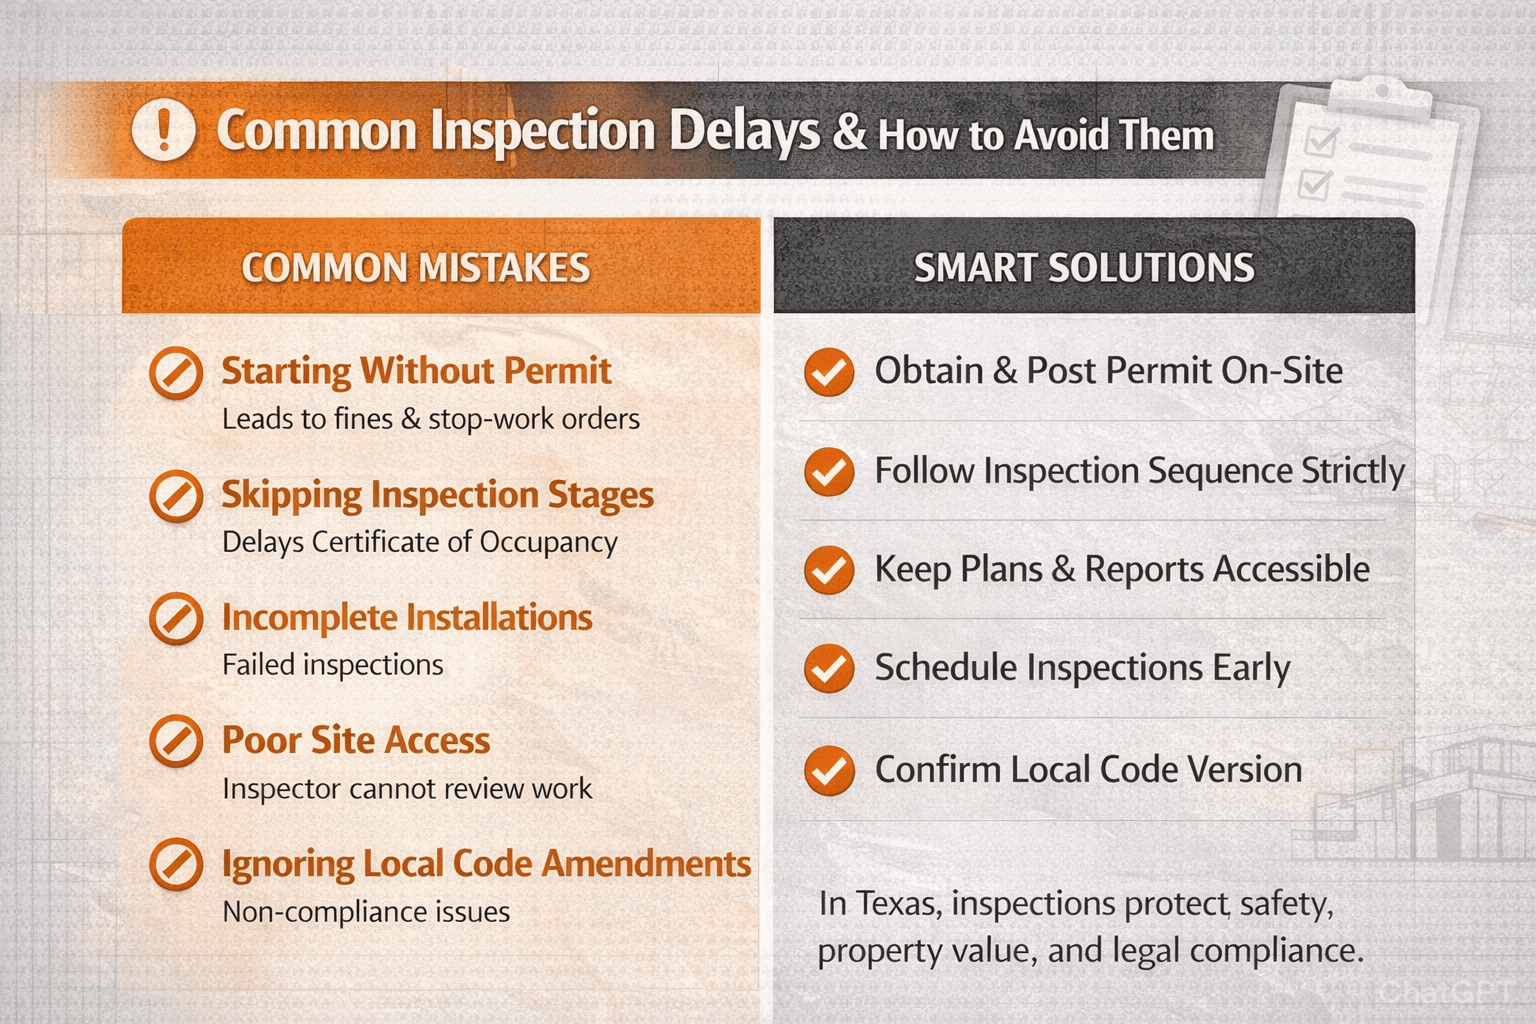
Common Mistakes That Delay Inspections
Missing permits or incorrect paperwork
Work done before the previous stage is approved
Poor site organization or blocked access
Incomplete or incorrect installations (plumbing, wiring, HVAC)
Not following local code amendments
Avoiding these mistakes keeps your project on schedule and reduces stress.
How Inspections Are Scheduled
Once your permit is issued, it’s time to schedule inspections. Inspections are not automatic—you must request them. Every city and county in Texas has its own scheduling process, but most follow a similar approach.
Scheduling Your Inspection
Inspections are usually scheduled through:
Online portals – Many cities allow you to submit requests and view inspection results online.
Phone systems – Some cities use automated phone systems to request inspections.
In-person requests – Rare, but still required in some jurisdictions.
When scheduling, you will need:
Permit number
Type of inspection requested
Project address and site contact information
Scheduling in advance gives inspectors time to review your plans and visit the site. Most cities ask for at least 48 hours’ notice before an inspection.
Timing and Waiting Periods
Inspections typically occur within 1–3 business days of scheduling. However, timing can vary depending on:
Workload of the inspection office
Weather conditions
Complexity of the project
Planning inspections early in the week can help avoid delays. Always check your city’s website for the most current scheduling policies.
What Happens When an Inspection Fails
Sometimes, inspections do not pass. This is common and usually not a major issue if addressed promptly.
Common reasons inspections fail include:
Work not matching approved plans
Incomplete or incorrect installations
Blocked access or unsafe site conditions
Missing documentation
When an inspection fails, the inspector will issue a report listing deficiencies. You are responsible for correcting the issues and scheduling a re-inspection.
Re-Inspection Process
Re-inspections ensure that corrections were made properly. Tips to make re-inspections smoother:
Correct all items listed in the report before calling for a re-inspection.
Take photos or notes to verify corrections.
Keep a copy of the failed inspection report on-site.
Some cities charge fees for repeated inspections, so fixing problems thoroughly the first time saves money.
Inspection Scheduling Summary Table
| Step | Description | Tips for Success |
|---|---|---|
| Request Inspection | Submit online, by phone, or in-person | Provide permit number and inspection type |
| Wait for Inspector | Typically 1–3 business days | Schedule early to avoid delays |
| Site Visit | Inspector evaluates work | Keep site clean, accessible, and safe |
| Pass/Fail Report | Inspector notes approval or deficiencies | Review report carefully and correct issues |
| Re-Inspection (if needed) | Inspector verifies corrections | Fix all issues thoroughly to avoid additional fees |
This table gives a clear workflow for inspection scheduling and follow-up.
Local Variations — What Can Change by City or County
Texas is a large state, and inspection rules vary by city and county. Understanding local differences helps you plan better.
Code Versions and Amendments
Most Texas cities adopt the International Codes (I-Codes), but they may include local amendments. Examples:
Wind-load requirements in coastal areas
Flood-zone or drainage rules
Energy efficiency requirements
Before construction begins, always confirm which code version your city enforces. Using the wrong code can cause delays or inspection failures.
Scheduling Systems Differ
Different jurisdictions have different scheduling platforms:
Austin: Online portal with 24/7 scheduling
Dallas: Phone and online scheduling available
Frisco: eTRAKiT system for permits and inspections
Check your city’s website to know the correct process and portal.
Local Fees and Requirements
Cities may charge inspection fees depending on the number of inspections or re-inspections. Some cities require:
Permit card displayed onsite
Approved plans available for the inspector
Specific safety equipment, like ladders or scaffolding
Being prepared for these local rules ensures inspections go smoothly.
City Variations Summary Table
| City | Scheduling Method | Local Requirement Highlights | Notes |
|---|---|---|---|
| Austin | Online portal | Permit card on-site, approved plans visible | Energy code compliance required |
| Dallas | Online + Phone | Display permit card, follow safety rules | Check wind-load requirements |
| Frisco | eTRAKiT system | Approved plans and site access required | Re-inspection fees may apply |
This table helps you understand how inspection requirements differ across major Texas cities.
Tips for Managing Local Variations
Research your city’s inspection rules before construction.
Check for local code updates regularly—rules change over time.
Prepare site documentation and post permits visibly.
Schedule inspections early to avoid conflicts with local inspectors’ workload.
Communicate with inspectors if unsure about local requirements.
Following these steps helps prevent delays and reduces stress during construction.
Final Building Inspection and Certificate of Occupancy
The last step in the building inspection process is the final inspection. This inspection ensures that all work is complete, safe, and matches the approved plans. Passing this inspection is critical because it leads to the Certificate of Occupancy (CO).
Final Inspection Checklist
Inspectors typically review:
Structural components (walls, roof, beams)
Electrical systems and outlets
Plumbing connections and fixtures
HVAC and mechanical systems
Safety features like fire alarms, smoke detectors, and emergency exits
Compliance with approved plans
Failing this inspection means you cannot legally occupy the building until corrections are made.
Certificate of Occupancy (CO)
The Certificate of Occupancy is the official document that confirms your building is safe and meets all codes.
Key points about a CO:
Legally required to occupy a building
Protects homeowners, tenants, and insurers
Confirms compliance with zoning and building regulations
Often required for property sales or loans
Receiving the CO is a major milestone. It signals the end of construction inspections and allows you to move forward safely.
Extra Tips for a Smooth Inspection Process
Planning and organization make inspections easier. Here are some practical tips:
Keep documents organized
Permit cards, approved plans, and inspection reports should be easy to access on-site.
Maintain site accessibility
Clear pathways and visible work allow inspectors to review everything efficiently.
Understand local codes
Know your city or county amendments to the International Codes.
Communicate proactively
Speak with inspectors if you are unsure about requirements.
Prepare for re-inspections
Correct all issues thoroughly before calling for a follow-up inspection to avoid fees and delays.
Common Mistakes to Avoid
| Mistake | How to Prevent It |
|---|---|
| Starting construction without a permit | Always obtain and post the permit before work begins |
| Missing or incomplete documentation | Keep all plans, permits, and reports organized on-site |
| Work done before prior inspections | Follow the correct inspection sequence strictly |
| Poor site accessibility | Clear paths and mark areas to be inspected |
| Ignoring local code changes | Regularly check city websites for updates |
Following this checklist reduces the chances of failed inspections and delays.
Real-World Examples
Example 1: Residential Home in Austin
A homeowner submitted plans and scheduled inspections in order. The foundation inspection revealed minor rebar spacing issues. The contractor corrected the issue, and subsequent inspections passed without problems. The CO was issued on schedule.
Example 2: Small Office in Dallas
The project skipped an insulation inspection. During the final inspection, the inspector cited the missing step. This required a re-inspection, delaying the CO by two weeks. The lesson: follow each inspection stage carefully.
Summary of the Texas Building Inspection Process
| Stage | Key Action | Outcome |
|---|---|---|
| Permit & Plan Review | Submit plans and obtain approval | Inspector knows what to check |
| Foundation Inspection | Check footings and rebar | Ensures strong structural base |
| Framing Inspection | Verify walls, beams, bracing | Prevents structural issues before drywall |
| Trade Inspections | Electrical, plumbing, HVAC | Confirms safety and code compliance |
| Insulation Inspection | Energy compliance before drywall | Efficient and compliant installation |
| Final Inspection | Overall review before occupancy | Confirms building meets codes |
| Certificate of Occupancy | Legal approval for occupancy | Final confirmation for safe use |
This table serves as a quick reference for builders, contractors, and homeowners.
Conclusion
Building a home or commercial property in Texas is exciting, but it comes with responsibilities—especially when it comes to inspections. Following the right process—from getting permits and plan approvals to scheduling foundation, framing, trade, insulation, and final inspections—keeps your project safe, legal, and on track.
Staying organized, understanding your local codes, and communicating with inspectors can make the process much less stressful. Passing all inspections not only protects your investment but also leads to your Certificate of Occupancy, letting you enjoy your new space with peace of mind. Remember, inspections aren’t just a formality—they’re your roadmap to building safely, correctly, and confidently.
Have questions or need help with your building inspections? Reach out to us—we’re here to guide you every step of the way!
FAQs: Building Inspection Process
What is a building inspection in Texas?
A building inspection is an official review of a construction project by trained inspectors. They ensure your project follows approved plans, meets local and state codes, and is safe for occupants. Inspections occur at various stages, from foundation to final inspection, protecting both your investment and future residents.
Why are building inspections important?
Building inspections:
Verify that construction follows local codes.
Identify safety hazards early.
Confirm compliance with approved plans.
Provide documentation for a Certificate of Occupancy (CO).
Skipping inspections can result in fines, legal issues, or unsafe buildings.
When do building inspections occur?
Inspections occur at key construction stages:
Foundation, before pouring concrete
Framing, after the structure is built
Electrical, plumbing, and HVAC rough-ins
Insulation, before drywall
Final inspection, after construction is complete
What are the main types of building inspections in Texas?
Common inspections include:
Foundation Inspection
Framing Inspection
Electrical, Plumbing, and Mechanical (Trade) Inspections
Insulation Inspection
Final Building Inspection
Do I need a permit before scheduling inspections?
Yes. Permits are required before any inspection. They authorize construction and set the scope for what inspectors will review. Starting construction without a permit can lead to fines or stop-work orders.
How do I get a building permit in Texas?
To get a permit:
Submit detailed construction plans.
Check local requirements (energy compliance, flood-zone verification).
Pay permit fees (varies by city/project).
Wait for city approval.
What is plan review and why is it necessary?
Plan review is a detailed evaluation of your submitted construction plans by the city. Inspectors check:
Site layout and setbacks
Structural details
Electrical, plumbing, and mechanical systems
Energy code compliance
This prevents delays and failed inspections later.
What happens during a foundation inspection?
Inspectors check:
Footing depth and width
Proper placement of reinforcing steel (rebar)
Formwork alignment with plans
Site drainage and soil conditions
A strong foundation ensures structural stability for the entire building.
What does a framing inspection include?
Framing inspections verify:
Correct placement of beams, joists, and walls
Adequate bracing and structural support
Proper door and window openings
Alignment with approved plans
Errors caught at this stage save time and money later.
What are trade inspections?
Trade inspections include:
Electrical: wiring, outlets, breakers, grounding
Plumbing: pipe placement, drainage, vents, water connections
Mechanical/HVAC: ductwork, vent installation, equipment support
These inspections ensure all systems are safe before walls are closed.
When is an insulation inspection required?
Insulation inspections occur before drywall installation. Inspectors check:
Type and thickness of insulation
Correct installation around pipes, ducts, and framing
Energy code compliance
Proper insulation improves energy efficiency and code compliance.
What is a final building inspection?
The final inspection occurs after construction is complete. Inspectors confirm:
Structural integrity and code compliance
Functioning electrical, plumbing, and HVAC systems
Safety features like smoke detectors and exits
Passing this inspection is required to obtain the Certificate of Occupancy.
What is a Certificate of Occupancy (CO)?
A CO is an official document stating your building is safe and meets all codes. It:
Legally allows occupancy
Protects homeowners and tenants
Confirms compliance with zoning and building regulations
Without a CO, you cannot legally occupy the building.
How do I schedule a building inspection in Texas?
Inspections are scheduled through:
Online city portals
Phone systems
In-person requests (rare)
You’ll need your permit number, type of inspection, project address, and contact information. Most cities require at least 48 hours’ notice.
What happens if an inspection fails?
If an inspection fails, the inspector issues a report listing deficiencies. You must:
Correct all issues
Schedule a re-inspection
Failure to address deficiencies can delay your project and may incur additional fees.
Are inspection requirements the same in all Texas cities?
No. Each city or county can have local amendments and different scheduling systems. For example:
Austin uses an online portal
Dallas offers phone and online scheduling
Frisco uses the eTRAKiT system
Always confirm local rules before construction.
What are common mistakes that delay inspections?
Missing or incomplete permits
Work done before previous inspections are approved
Poor site accessibility
Not following local code amendments
Avoiding these mistakes helps keep your project on schedule.
How can I prepare for a successful inspection?
Keep the site clean and accessible
Display permit cards and approved plans
Communicate clearly with the inspector
Correct any issues promptly
Proper preparation increases the chances of passing on the first attempt.
How long does it take to get inspection results?
Inspection results are usually available within 1–3 business days, depending on:
Workload of the inspection office
Weather conditions
Project complexity
Most cities provide results online or via phone notification.
Can I occupy my building before receiving a CO?
No. Occupying a building without a Certificate of Occupancy is illegal and can result in fines, penalties, and insurance issues. The CO confirms your building is safe, compliant, and ready for use.