If you are building, remodeling, or managing a project in Austin, inspections are part of the process. You cannot close a permit without them. You also cannot move forward to the next stage of work without approval from the City.
In the past, many contractors relied on phone calls to request inspections. Now, most inspection scheduling happens online through the City of Austin’s updated system. If you are new to it, the process may feel confusing at first. However, once you understand the steps, it becomes routine.
This guide explains how inspection scheduling works on the new City of Austin website. It focuses on practical steps. It also explains common problems and how to avoid delays.
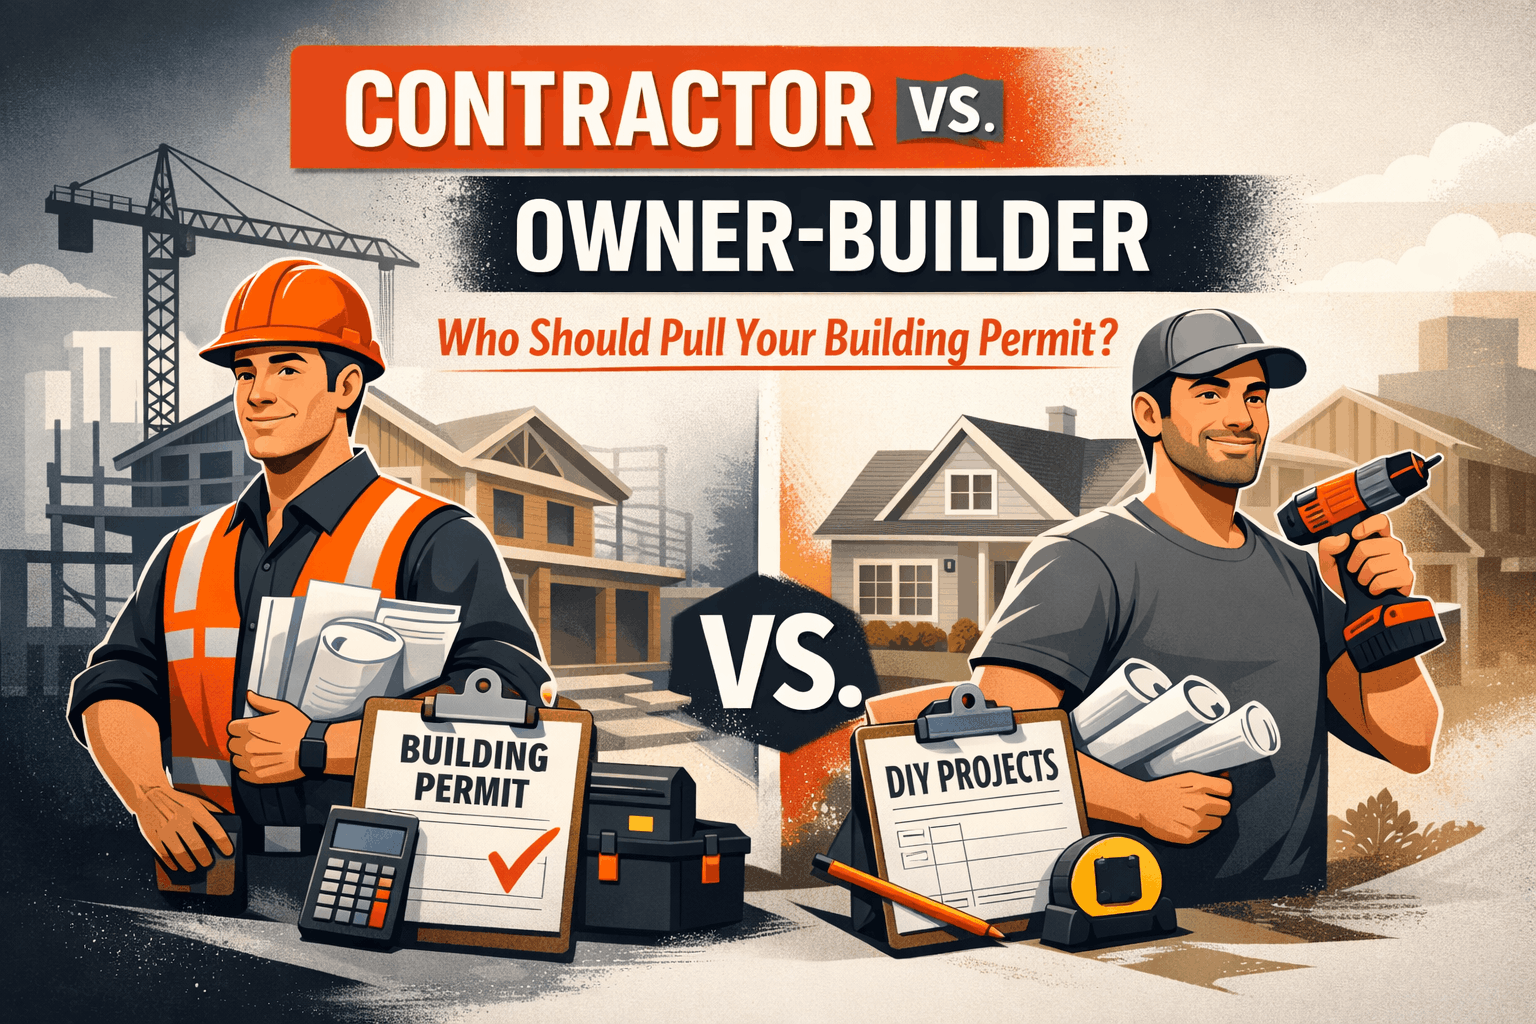
Whether you are a general contractor, trade contractor, developer, or homeowner pulling your own permit, this article will help you schedule inspections correctly the first time.
What This Guide Will Cover
This blog walks through the early stage of the inspection process. Specifically, it covers:
-
What inspections are and why they matter
-
Who can schedule inspections in Austin
-
How the City of Austin’s online system works
-
What you need before scheduling
-
Key terms you should understand
Later sections will go step by step through the actual scheduling process. The goal is simple: help you avoid rejected requests, missed inspections, and costly delays.
If you manage multiple permits or large-scale development projects, staying organized is critical. Even small errors in inspection requests can slow down construction timelines. That is why understanding the system matters.
Why Inspections Matter for Your Permit
Every active building permit in Austin requires inspections. These inspections confirm that work meets local building codes, safety standards, and approved plans.
Inspections protect:
-
Occupants
-
Property owners
-
Contractors
-
Future buyers
-
The public
Without inspection approval, you cannot finalize a permit. Here are some common inspection types tied to permits:
| Inspection Type | When It Happens | Why It Matters |
|---|---|---|
| Foundation Inspection | Before concrete is poured | Confirms structural base meets approved plans |
| Framing Inspection | Before drywall | Ensures structure is safe and code compliant |
| Electrical Inspection | Before covering wiring | Verifies safe installation |
| Plumbing Inspection | Before walls are closed | Confirms proper pipe installation |
| Final Inspection | At project completion | Required to close permit |
If an inspection fails, work may need correction. That means additional labor, material costs, and schedule changes. Therefore, scheduling inspections at the correct stage of construction is critical.
In short, inspections are not just a formality. They are required checkpoints in your construction timeline.
The City of Austin’s Digital System for Inspection Scheduling
The City of Austin now uses an online platform for permits and inspections. Most scheduling happens through the Austin Build + Connect portal, often called AB+C.
This system allows users to:
-
View active permits
-
Pay permit fees
-
Request inspections
-
Check inspection results
-
Review status updates
The shift to an online system has improved tracking and recordkeeping. You can now see inspection history tied directly to your permit number. That makes documentation easier for contractors and developers managing multiple projects.
However, many people struggle with the system at first. Common issues include:
-
Permits not linked to accounts
-
Inspection types not appearing
-
Requests blocked due to unpaid fees
-
Incorrect inspection codes
These problems are avoidable. In most cases, the issue relates to permit status or account setup. Understanding how the system works before you submit a request saves time and prevents frustration.
Overview of the City of Austin’s Inspection System
Before scheduling an inspection, you need to understand how the system is structured. Not all inspection are scheduled the same way. Also, not all users have the same access rights.
Let’s break it down clearly.
What Is the Austin Build + Connect (AB+C) Portal?
The Austin Build + Connect portal is the City’s online permitting and inspection platform.
It connects your permit record to:
-
Inspection scheduling
-
Plan review updates
-
Fee payments
-
Status tracking
Every permit has a unique permit number. That number is central to scheduling inspections. If you do not have a valid permit number, you cannot request an inspection.
To use the system, you must:
-
Create an account
-
Log in
-
Link your permit (if not automatically connected)
If your permit is active and fees are paid, inspections become available for scheduling. Here is a quick overview:
| Requirement | Why It Matters |
|---|---|
| Active Permit | Only active permits allow inspection requests |
| Paid Fees | Outstanding balances may block scheduling |
| Correct Permit Type | Inspection options depend on permit category |
| Account Access | You must be listed or authorized |
If one of these items is missing, the system may not show inspection options.
Types of Inspections You Can Schedule in Austin
Austin has multiple inspection categories. The inspection type depends on your permit. Common categories include:
-
Building inspections
-
Electrical inspections
-
Mechanical inspections
-
Plumbing inspections
-
Trade-specific inspections
-
Site inspections
For example, a residential remodel may require:
-
Rough framing inspection
-
Rough electrical inspection
-
Insulation inspection
-
Final building inspection
A commercial development may involve:
-
Structural steel inspection
-
Fire protection inspection
-
Accessibility compliance inspection
-
Site utility inspection
Each inspection has a code attached to it. Selecting the correct code is important. Choosing the wrong inspection type can result in a failed visit or cancellation.
If you are unsure which inspection applies, review your approved permit documents. The inspection sequence is usually outlined there.
Who Can Schedule an Inspection in Austin?
Not everyone can request inspections. Access depends on how the permit is set up. Typically, the following parties can schedule inspections:
-
General contractors listed on the permit
-
Licensed trade contractors attached to the permit
-
Homeowners (if they pulled the permit)
-
Authorized agents
If you are not listed on the permit, the system may block you from scheduling. In some cases, contractors need to coordinate internally. For example:
-
The electrician schedules electrical inspections
-
The plumber schedules plumbing inspections
-
The general contractor schedules building inspections
Clear communication between trades helps prevent double bookings or missed inspections. Before attempting to schedule, confirm:
-
Your name or company is listed on the permit
-
The permit status is active
-
All required fees are paid
These simple checks can prevent most scheduling problems.
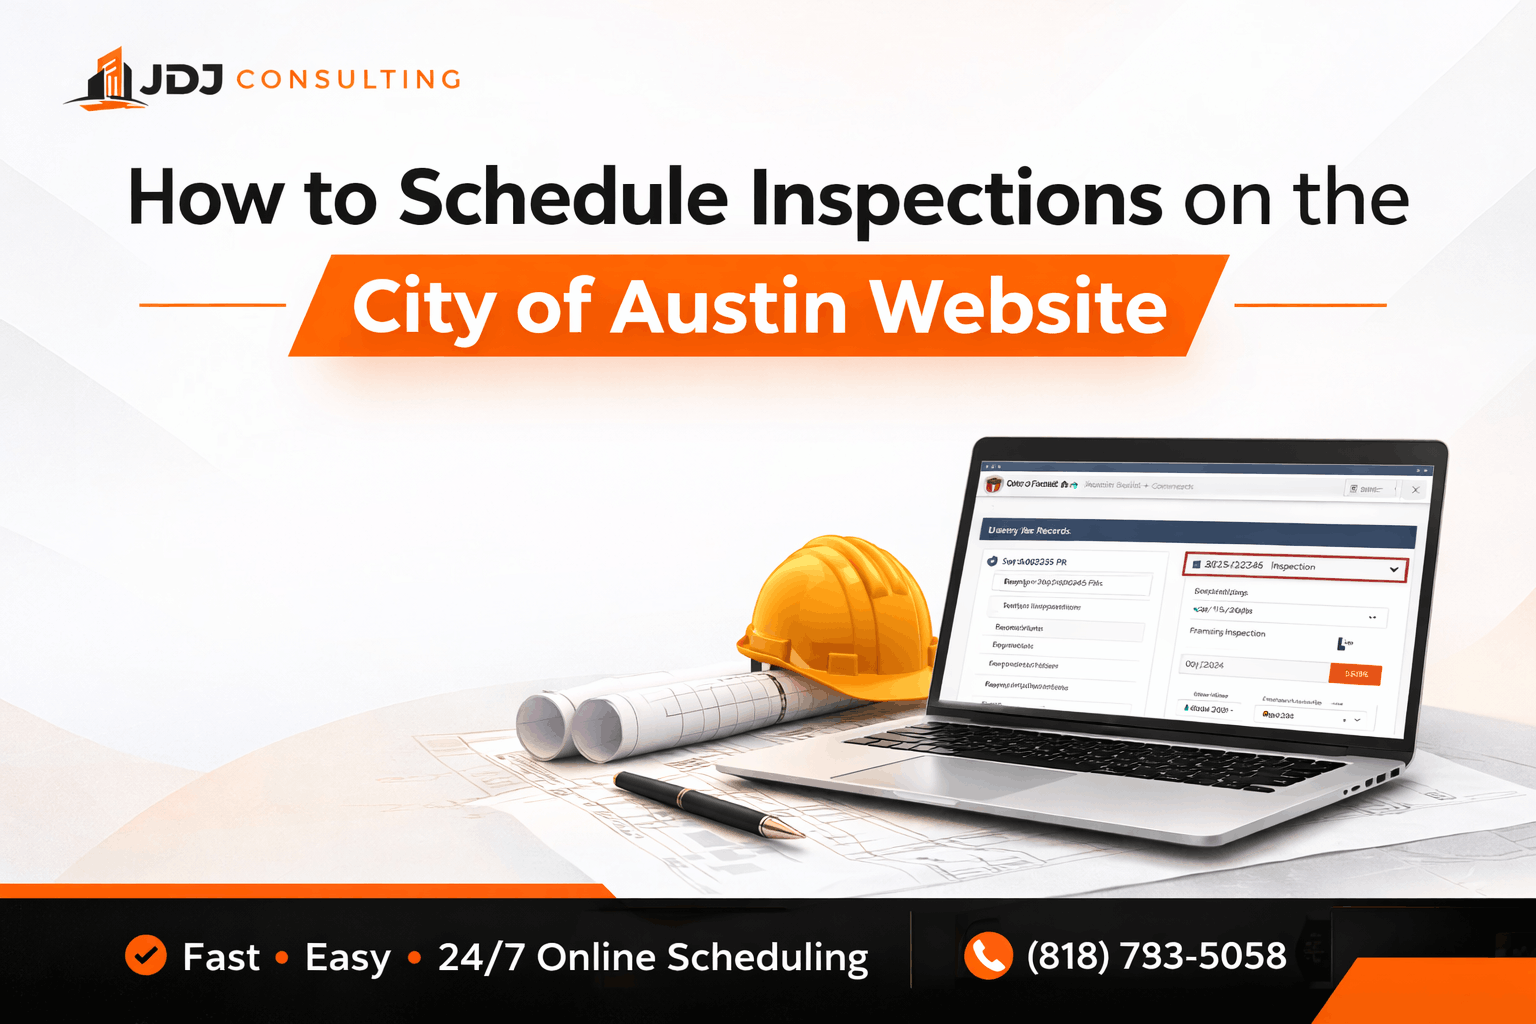
Step-by-Step: How to Schedule Inspections on the New City of Austin Website
Once your permit is active and your account is set up, scheduling an inspection becomes straightforward. Still, small mistakes can cause delays. So it helps to follow a clear process.
Below is a practical step-by-step breakdown based on how the City of Austin’s online system works today.
Step 1: Create and Set Up Your AB+C Account
If you do not already have an account, you must register first.
Go to the City of Austin permit portal and create a user profile. Use your business email if you are a contractor. That makes tracking easier across multiple projects.
During setup:
-
Enter your full legal name
-
Add your company name (if applicable)
-
Include your license number (for trade contractors)
-
Verify your email
After creating the account, log in.
Next, confirm that your permit appears in your dashboard. In many cases, the permit automatically connects if your email matches the contractor listed on the application.
If it does not appear, you may need to:
-
Search by permit number
-
Request access to the permit record
-
Confirm you are listed correctly
Without access to the permit, you cannot request inspections. Before moving to the next step, double-check the following:
| Item to Confirm | Where to Check | Why It Matters |
|---|---|---|
| Permit Status | Permit summary page | Must show “Active” |
| Fees Paid | Payment section | Unpaid fees block requests |
| Correct Contractor Listed | Permit details | Access depends on listing |
| Inspection Stage Ready | Construction progress | Prevents failed inspections |
These checks take only a few minutes. However, they prevent days of delay.
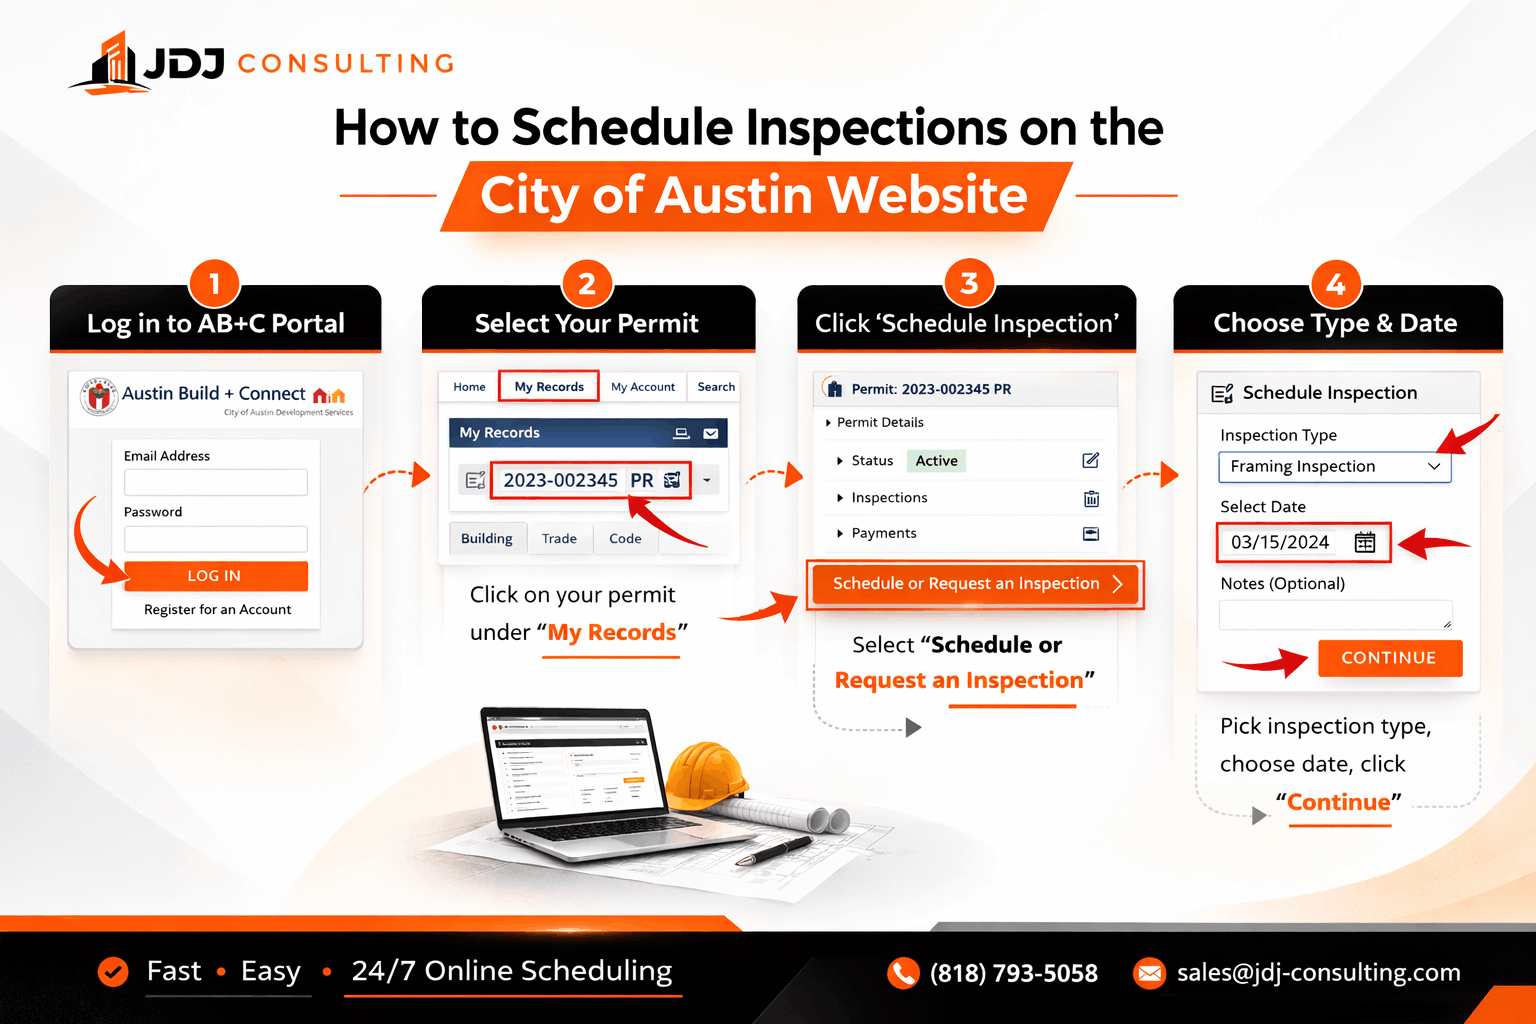
Step 2: Log In and Locate Your Permit
After signing in, go to your dashboard.
Most users will see:
-
My Records
-
My Permits
-
Inspections
-
Payments
Click on your permit number. This opens the permit detail page.
Here, you can review:
-
Permit type
-
Project address
-
Current status
-
Inspection history
-
Available inspection types
If your permit does not show inspection options, one of three things is likely happening:
-
The permit is not active
-
Fees are still due
-
The system has not updated yet
In some cases, recently issued permits take a short time to appear fully in the inspection system. If everything looks correct, continue to inspection scheduling.
Step 3: Select the Correct Inspection Type
Inside the permit page, look for the inspection request section. This is often labeled clearly. You will see a list of inspection types tied to your permit.
Choose carefully.
Each inspection has a code and description. For example:
-
Rough Framing
-
Rough Electrical
-
Plumbing Top-Out
-
Mechanical Rough
-
Final Building
Selecting the wrong inspection can result in:
-
Inspector unable to perform the visit
-
Failed inspection
-
Need to reschedule
If you are unsure which inspection to request, check:
-
Your approved construction plans
-
Your inspection card
-
Notes from prior inspections
Here is a simple reference example:
| Construction Stage | Likely Inspection Needed |
|---|---|
| Foundation forms ready | Foundation inspection |
| Framing complete | Rough framing |
| Wiring installed | Rough electrical |
| All work complete | Final inspection |
Always schedule inspections only when the work is fully ready. Inspectors will not partially inspect incomplete work.
Step 4: Choose the Inspection Date
After selecting the inspection type, you will be prompted to choose a date. The system typically allows next-business-day scheduling if requested before the daily cutoff time.
Keep these best practices in mind:
-
Do not schedule until work is complete
-
Ensure access to the site is available
-
Make sure someone responsible can answer inspector questions
-
Avoid scheduling multiple trades on the same day unless fully coordinated
Inspection time windows are usually broad. You may receive a general window rather than an exact time. Plan your crew schedule accordingly.
If your project requires coordination between trades, confirm readiness before booking multiple inspections. This prevents repeat visits.
Step 5: Add Notes for the Inspector (If Needed)
There is often a comments section. Use it wisely. Helpful information may include:
-
Gate codes
-
Lockbox details
-
Special access instructions
-
On-site contact phone number
Keep notes short and clear. Avoid unnecessary details. This small step can prevent missed inspections.
Step 6: Submit and Confirm the Inspection Request
After reviewing the details, submit the request. You should receive confirmation on the screen. Many users also receive email confirmation.
Before logging out, confirm:
-
Correct inspection type
-
Correct address
-
Correct date
-
No error messages
If the system displays an error, read it carefully. Common messages include:
-
Permit not eligible
-
Inspection already scheduled
-
Outstanding fees
Most system errors relate to permit status or duplicate scheduling. If confirmation appears successfully, your inspection is now scheduled.
What Happens After You Schedule an Inspection
Scheduling is only part of the process. Preparation determines whether the inspection passes.
Confirmation and Tracking
After scheduling, you can monitor inspection status in your permit dashboard. You may see statuses such as:
-
Scheduled
-
Completed
-
Passed
-
Failed
-
Partial Pass
Results are usually posted after the inspection is complete. Make it a habit to check results the same day. This keeps your project moving.
Inspection Day: What to Expect
On inspection day:
-
Ensure the work area is clear
-
Provide safe access
-
Have approved plans available
-
Ensure responsible personnel are reachable
Inspectors verify compliance with the approved permit and building codes. They may take notes or photos. If everything meets requirements, the inspection will pass.
If issues are found, you will receive comments explaining corrections.
Understanding Pass, Partial, and Fail Results
Inspection outcomes generally fall into three categories:
| Result | Meaning | Next Step |
|---|---|---|
| Pass | Work approved | Move to next stage |
| Partial | Some items approved | Correct remaining items |
| Fail | Work not approved | Correct and reschedule |
Do not panic if you receive a failed inspection. It is common during construction.
Instead:
-
Review comments carefully
-
Complete required corrections
-
Schedule a reinspection
Respond quickly. Delays in reinspection can slow your entire project timeline.
Rescheduling or Canceling an Inspection
Sometimes plans change. Work may not be ready. If needed, cancel or reschedule as early as possible through the portal. Late cancellations may cause delays or require additional coordination. Always communicate with your team before canceling. Make sure all trades stay aligned.
Common Issues When Scheduling Inspections in Austin (And How to Fix Them)
Even experienced contractors run into system problems. Most issues are not serious. However, they can delay your project if you do not address them quickly.
Below are the most common inspection scheduling problems in Austin and what you can do about them.
My Inspection Option Is Not Showing
This is one of the most frequent complaints. You log in. You open your permit. But there is no inspection option available.
In most cases, the issue is one of the following:
-
The permit is not active
-
Fees are still unpaid
-
You are not listed on the permit
-
The inspection stage is not yet eligible
-
The permit was issued very recently
Start by checking the permit status. If it does not say Active, you cannot request inspections. Next, check the payment tab. Even a small outstanding balance can block scheduling.
If everything looks correct but the inspection type still does not appear, verify that you are listed correctly as the contractor or authorized agent.
Sometimes administrative updates take time to reflect in the system. If the permit was issued today, give the system time to update before assuming there is an error.
The System Shows an Error Message
When submitting an inspection request, you may see an error notice. Common messages include:
-
“Permit not eligible for inspection”
-
“Inspection already scheduled”
-
“Outstanding balance due”
-
“Invalid inspection code”
Each message points to a specific issue. Here is a quick reference:
| Error Message | Likely Cause | Solution |
|---|---|---|
| Permit not eligible | Permit inactive | Confirm permit status |
| Outstanding balance | Fees unpaid | Pay remaining fees |
| Inspection already scheduled | Duplicate request | Check inspection history |
| Invalid inspection code | Wrong inspection selected | Review permit inspection list |
Read the error carefully. Do not guess. Most problems can be resolved in minutes once identified.
Inspector Arrived but Work Was Not Ready
This is not a system issue, but it is common. Sometimes crews schedule inspections too early. For example:
-
Wiring not fully installed
-
Framing incomplete
-
Required documents missing
-
Work area blocked
If the inspector cannot complete the inspection, it may result in a failed visit. That means rescheduling and possible delays.
To avoid this:
-
Walk the site before requesting inspection
-
Confirm all trades are finished
-
Ensure access is clear
-
Have approved plans on site
Small preparation steps prevent unnecessary reinspections.
Inspection Failed — What Now?
A failed inspection does not mean your project is in trouble. It simply means corrections are needed. When you receive a failed result:
-
Review the inspector’s notes carefully
-
Share comments with the responsible trade
-
Complete corrections
-
Schedule reinspection
Avoid guessing what the inspector meant. If something is unclear, contact the department for clarification. Correct the issue fully before scheduling again. Repeated failures slow projects and can affect contractor reputation.
Tips to Avoid Inspection Delays on Austin Projects
Inspection delays affect budgets and timelines. Developers and contractors working on multiple projects must stay organized. Here are practical tips that help keep projects moving.
Schedule at the Right Time
Do not rush to schedule inspections just to stay ahead.
Instead:
-
Confirm work is 100% complete for that stage
-
Verify coordination between trades
-
Make sure no last-minute changes are pending
Rushing often causes more delay than waiting one extra day.
Keep Your Permit Records Organized
For contractors managing multiple permits, organization matters. Maintain a simple internal tracking system that includes:
-
Permit number
-
Address
-
Inspection stage
-
Scheduled date
-
Result
-
Notes
Here is a simple example format:
| Permit # | Address | Inspection Type | Scheduled Date | Status | Notes |
|---|---|---|---|---|---|
| 2024-00123 | 123 Main St | Rough Electrical | March 5 | Scheduled | Waiting on panel install |
| 2024-00456 | 456 Oak Ave | Framing | March 6 | Passed | Move to insulation |
A basic tracking sheet prevents missed inspections and confusion across teams.
Communicate Clearly With Trades
Inspection scheduling often breaks down due to poor coordination.
For example:
-
Electrician schedules rough inspection
-
Framing is not complete
-
Inspector fails the visit
Before scheduling, confirm with all trades involved. A short call or text can prevent costly delays.
Use the Notes Section Properly
If your site has:
-
Gate codes
-
Limited access
-
Lockboxes
-
Special safety requirements
Include that information clearly in the notes section. Inspectors manage full schedules. Clear instructions reduce missed visits.
Monitor Inspection Results the Same Day
Do not wait several days to check results. Log in and review inspection outcomes as soon as they are posted. If corrections are required, act immediately. Fast response keeps your project on track.
When to Contact the City of Austin for Help
Most scheduling issues can be resolved online. However, sometimes direct communication is necessary. Contact the City if:
-
The permit shows active but inspections are unavailable
-
The system repeatedly gives errors
-
Inspection results seem incorrect
-
You need clarification on correction notes
Before calling or emailing, gather:
-
Permit number
-
Property address
-
Inspection type
-
Screenshot of error (if possible)
Providing complete information speeds up assistance. Be clear and professional in communication. City staff handle many requests daily. Clear details help them help you.
Final Thoughts on Scheduling Inspections in Austin
Scheduling inspections through the City of Austin’s online system is now standard practice. While the portal may feel complex at first, the process becomes routine once you understand it.
The key points to remember are simple:
-
Make sure your permit is active
-
Confirm all fees are paid
-
Choose the correct inspection type
-
Schedule only when work is ready
-
Check results promptly
Most delays happen because of small oversights. Careful preparation and clear communication prevent them. For contractors and developers managing projects across Austin, staying organized is critical. Inspection scheduling is not just an administrative task. It directly affects timelines, budgets, and client satisfaction.
If your team needs help coordinating permits, inspections, or compliance requirements in Austin, professional guidance can reduce risk and keep your project moving smoothly.
FAQs About How to Schedule Inspections on New City of Austin Website
Many contractors and property owners run into the same questions. Below are clear answers to help you avoid confusion and delays.
Do I Need a Permit Before Scheduling an Inspection?
Yes. You cannot schedule an inspection without an active permit. The permit must:
-
Be approved and issued
-
Show an “Active” status
-
Have all required fees paid
If your permit is still under review, inspection options will not appear. Always confirm permit issuance before trying to book an inspection.
How Far in Advance Can I Schedule an Inspection?
Most inspections can be scheduled for the next business day if requested before the daily cutoff time.
However:
-
High-demand periods may fill quickly
-
Large commercial projects may require coordination
-
Special inspections may require advance planning
If your project timeline is tight, schedule as soon as work is ready. Avoid waiting until the last minute. Inspection availability can impact your construction schedule.
Can I Cancel or Reschedule an Inspection?
Yes. You can cancel or reschedule through the online portal. It is best to make changes as early as possible. Last-minute cancellations can create delays for your project and others.
Before canceling:
-
Confirm with all trades
-
Make sure work truly is not ready
-
Check the system for the next available date
Clear communication helps prevent unnecessary rebooking.
What Time Will the Inspector Arrive?
Inspection windows are typically broad. You may receive a general time range instead of a specific appointment time. Inspectors manage multiple visits per day, so exact arrival times are not guaranteed.
Plan for flexibility. Make sure:
-
The site is accessible
-
A responsible contact is reachable
-
All required work is visible
Being prepared reduces the risk of missed inspections.
What Happens If I Miss My Inspection?
If the inspector cannot access the site or the work is not ready, the visit may be marked failed or incomplete. You will then need to:
-
Correct the issue
-
Reschedule the inspection
Missed inspections can slow down your timeline. In some cases, repeated issues may draw additional review. Always confirm site readiness before scheduling.
How Do I Prepare for a Final Inspection?
Final inspections close out your permit. Preparation is critical. Before requesting a final inspection:
-
Confirm all prior inspections passed
-
Complete all construction work
-
Remove debris
-
Ensure safety features are installed
-
Verify all required documents are on site
If your project includes multiple trades, confirm each trade has completed its work and passed required inspections. A failed final inspection can delay certificate approvals and project completion.
Inspection Best Practices for Contractors and Developers
Beyond scheduling, project management plays a major role in inspection success. Below are strategies that experienced builders use to reduce inspection delays.
Build Inspection Time Into Your Schedule
Inspection approvals are checkpoints. They are not optional. When building your project timeline:
-
Account for inspection lead time
-
Allow time for possible corrections
-
Avoid stacking inspections too tightly
Construction schedules that ignore inspection timing often experience unnecessary stress.
Keep Clear Internal Communication
On larger projects, multiple people may be involved:
-
Project managers
-
Site supervisors
-
Trade contractors
-
Administrative staff
Everyone should know:
-
Which inspections are scheduled
-
When they are scheduled
-
What stage the project is in
Clear communication prevents duplicate bookings and missed visits.
Maintain Documentation
Keep organized records of:
-
Permit numbers
-
Inspection results
-
Correction notices
-
Reinspection dates
Documentation helps if questions arise later. It also supports smoother project closeout.
Review Correction Notes Carefully
If an inspection fails, do not rush to reschedule.
Instead:
-
Read every comment
-
Confirm understanding
-
Make complete corrections
Partial fixes often lead to repeated failures. Careful review saves time and money.
Closing Thoughts: Keeping Your Austin Project Moving Forward
Scheduling inspections on the City of Austin website is now a standard part of construction management. At first, the system may seem detailed. However, once you understand the structure, the process becomes consistent.
Success depends on a few simple principles:
-
Verify permit status
-
Pay required fees
-
Select the correct inspection
-
Schedule only when work is ready
-
Monitor results immediately
These habits reduce stress and prevent delays.
For developers, contractors, and property owners working in Austin, inspections are more than a requirement. They are control points that protect safety and ensure compliance. Managing them properly keeps your project on schedule and in good standing with the City.
If your team needs help coordinating permits, inspection planning, or regulatory requirements in Austin, working with experienced consultants can reduce risk and improve efficiency. Proper planning today prevents costly setbacks tomorrow.
Need Help With Austin Inspections?
Inspection scheduling can slow your project down if not handled properly. If you’re dealing with permit issues, failed inspections, or portal confusion, JDJ Consulting can help. We support contractors and developers with:
-
Permit coordination
-
Inspection scheduling
-
Correction responses
-
Compliance support
Let’s keep your project moving.
- Phone: (818) 793-5058
- Email: sales@jdj-consulting.com